
I call these my Grapes Earrings. They are Christmas 2006 and birthday 2007 gifts for my girlfriends.
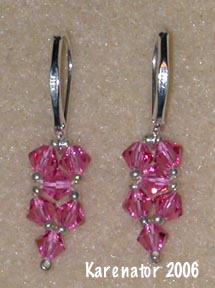
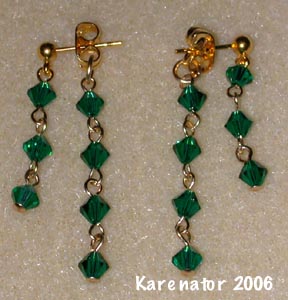
I'm making one in a different color for a fundraising auction, and will post it here when it's ready.


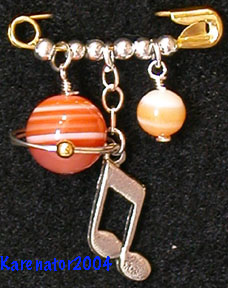
For people who asked, I made the same pin, but without the music note charm.
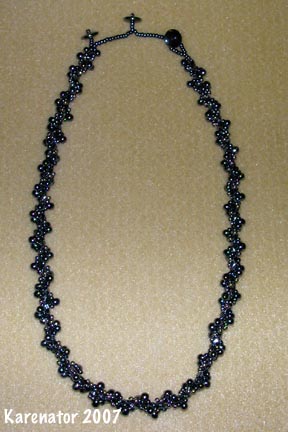
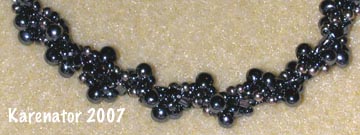
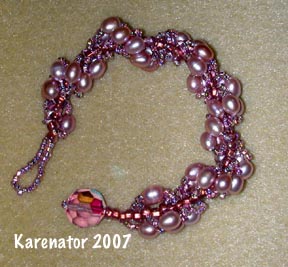
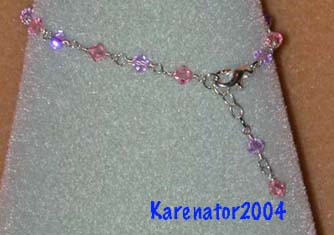
The necklace started as a class project in a Basic Bead Stringing class at the Pasadena Bead Company. The bracelet and earrings were made from the leftovers. The necklace uses 12mm, 10mm, 8mm and 6mm Cobalt colored cloisonne beads, dark green and royal blue seed beads, and 2mm, 3mm and 4mm gold spacer beads. The necklace and bracelet were strung on Softflex, and the earrings were strung on nylon beading string.


This was made for a wedding, intended to be a pretty container for a gift certificate. It's made in the style of an accordion book, with lacy heart gift wrap on the outside and gold paper inside, and a lace bow (center tied with thread), and the charm and pearls attached. Pearls are glued to the card so they don't flop around.
A matching envelope was made out of the gift wrap paper using a Kreat-a lope template. I made a label area on the front using plain paper with the corners punched, and outlined with gold foil. It was sealed with a gold sticker
Pins made with Ultra Thick Embossing Enamel:  These are done on pieces of plain ol' cardboard with two or three layers of either platinum or bronze UTEE, and small "silver lined glass beads" dropped into the hot UTEE. The beads stick pretty well, but I sometimes do another layer of UTEE around them to make sure they stick. They were first made for Rubber Stamp Roundup in Las Vegas, April 1998.
Christmas bells for 1997:  Believe it or not, these bells started their lives as communion cups! First, I used a hot nail to melt a hole in the top. Then, spray painted them inside and out with their base color, "flicked" the colored speckles with a fan brush, and then gave them a shot of spray glitter. Finally, I threaded a loop of ribbon through a bell, stuffed the ribbon through the hole, and that was that. Everyone got at least one on their Christmas presents, and the rest went on the Christmas tree. One of my aunts liked them so much she raided the tree for them after the family Christmas party!
Dad's birthday card (1998):  The base card is two pieces of cardboard covered with (yes, I cheated) the flowered contact paper. The circle frame is circle-cut chipboard covered with bronze UTEE. The flowers are the large and medium 3-D flowers done in pink tones and peach tones. The hearts are woodsies covered in magenta or scarlet pigment ink, and a couple layers of clear UTEE. The inside is lined with gold giftwrap, and a birthday word stamp stamped on plain white cs and edged with ripple scissors.

Covers are two pieces of cardstock, stab-bound in the center. Plain piece of paper in the middle (if copying this card, middle piece should be decorated _before_ binding card). I don't really remember where exactly each of the stamps is from, except the cherries are from the Hero Arts Tiny Shapes set. Background piece (cherries and "hello") is one piece, bear is a separate piece (lightly stamped, colored, re-stamped with black using a stamp positioner, and then cut out), and sign the bear is holding is a separate piece. All layers were Rollotaqued together, except the sign which is held on by foam mounting tape.
Click here to see cards I received from DottyMary's swap.
Mae, Karen (North), Natalie, and Francine took me up on my Lacy Proposition.
These are the samples. Let's see what they come up with!
Here they are!
Francine Shivas uses a cupid and a Love stamp with two of the pieces on the same card  Natalie Butler creates a Valentine's card with the red lace
  and Mae Cormier makes a shirt card
  and an angel card
 and open.
 This is called "Wire Bound with Curlicues".
  The book is really neat, but the wire got to be a pain (literally!) to work with after a while.
 These are luggage tags I made out of shrink plastic. The unshrunk size was about 2x4 inches, and shrank down to about 3/4 x 1 1/2 inches. Because I used only a 1/2-inch split ring, I attached the ring to the pieces before I shrank them, and also punched the holes on both ends (one end for the ring, and the other to thread ribbon through to keep the address covered). They're colored with Sharpie (permanent ink) pens.
Comments? Questions? Email Me!